loading...


.jpg.jpeg)
The Problem Nobody Talks About
You just finished your college VLSI course. You know Verilog. You can write a counter, a state machine, or a simple ALU. You think you're ready for an internship or your first job.
Then the code review happens.
Your manager returns your RTL with 30 comments. "Use non-blocking assignments here." "Why are you using blocking reset?" "This won't synthesize properly." "Your clock domain crossing is dangerous."
You're confused. Your code worked in simulation. It passed the testbench. What's the problem?
Welcome to the gap between college HDL coding and industry RTL design.
This gap is what separates the 90% of freshers who struggle in their first projects from the 10% who get promotions and respect. The good news? These aren't hard concepts. They're just patterns that nobody teaches systematically.
Today, I'm breaking them down.
Why RTL Design Best Practices Actually Matter
Before we dive into the practices, let's be clear: this isn't pedantic coding style.
When you ignore these practices:
When you follow these practices:
That last point? That's the secret advantage freshers don't realize. Good RTL design habits make debugging 5x faster. And debugging is 50% of your job.
The 6 Best Practices Every Fresher Should Master
#1: Synchronous Reset Design (Not Asynchronous Reset)
What freshers do:
always @(posedge clk or negedge rst_n) begin
if (!rst_n)
counter <= 4'b0;
else
counter <= counter + 1;
end
Why this is risky:
What companies want:
always @(posedge clk) begin
if (rst_sync) // Synchronized reset signal
counter <= 4'b0;
else
counter <= counter + 1;
end
With a reset synchronizer:
// Reset synchronizer (required in every design)
reg rst_sync_1, rst_sync_2;
always @(posedge clk or negedge rst_n) begin
if (!rst_n) begin
rst_sync_1 <= 1'b1;
rst_sync_2 <= 1'b1;
end
else begin
rst_sync_1 <= 1'b0;
rst_sync_2 <= rst_sync_1;
end
end
assign rst_sync = rst_sync_2;
Why this matters:
#2: Non-Blocking vs. Blocking Assignments (This One Gets Everyone)
What freshers do (WRONG):
always @(posedge clk) begin
a = b; // Blocking assignment
c = a; // c gets the NEW value of a (from line above)
end
What happens:
a is updated to b
c is updated to the new value of a (which is b)
This creates combinational logic inside a sequential block → synthesis issues
What companies want (RIGHT):
always @(posedge clk) begin
a <= b; // Non-blocking assignment
c <= a; // c gets the OLD value of a (from previous cycle)
end
The simple rule:
Blocking assignments (=) → For combinational logic (assign, always @(*))
Non-blocking assignments (<=) → For sequential logic (always @(posedge clk))
Why? Non-blocking assignments execute in parallel, modeling actual hardware behavior. Blocking assignments execute sequentially, which is how simulation works, but NOT how synthesis works.
Example of what freshers ship:
// WRONG - mixing blocking and non-blocking
always @(posedge clk) begin
a = b; // Blocking
c <= a; // Non-blocking
d <= e; // Non-blocking
end
Example of correct code:
// RIGHT
always @(posedge clk) begin
a <= b; // Non-blocking
c <= a; // Non-blocking (c gets OLD a)
d <= e; // Non-blocking
end
Real-world impact: A fresher once submitted RTL where they mixed blocking/non-blocking assignments. In simulation, it worked. In synthesis, the tool created extra registers and combinational loops. Timing closure failed. It delayed the project by 2 weeks.
#3: Avoid Combinational Loops at All Costs
What freshers accidentally create:
always @(*) begin
a = b;
b = a + 1; // COMBINATIONAL LOOP!
end
Or more subtly:
assign a = b + c;
assign b = a & d; // Loop created
Why this kills you:
How to avoid:
#4: Implement Lint Rules from Day 1 (This Saves 50% of Debug Time)
What freshers ignore: "I'll worry about linting later. Let me just get it working first."
Reality:
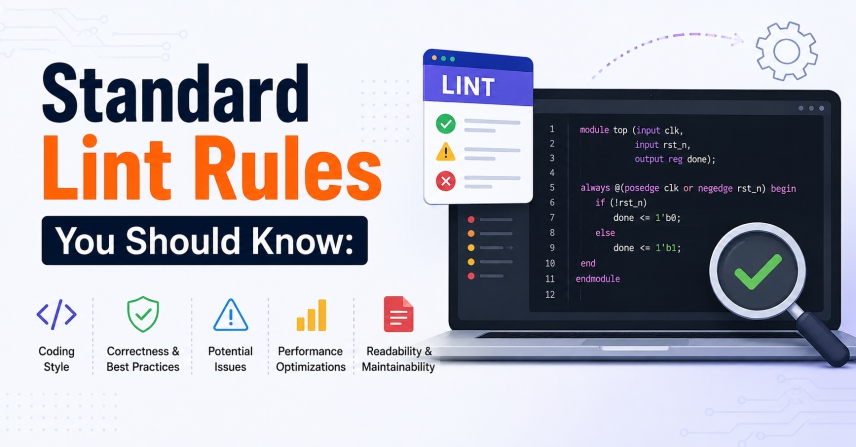
Standard Lint Rules You Should Know:
// Turn on these checks in your simulation/synthesis environment:
- W504: Non-blocking assignment not used in sequential always block
- W505: Blocking assignment used in sequential always block
- W506: Combinational logic in sequential always block
- W560: Unused variable
- W570: Unused port
- W1089: Non-constant width verilog expression
- W1098: Incomplete variable assignment (can cause latches)
Example of a real lint error:
always @(posedge clk) begin
if (enable)
result <= a + b;
// LINT WARNING: What if enable=0? result keeps old value (latch!)
end
// Better:
always @(posedge clk) begin
if (enable)
result <= a + b;
else
result <= result; // Explicit latch or use reset
end
How to use lint:
Companies check this automatically: Every design code is linted before review. Lint warnings = immediate rejection.
#5: Think About Testability from the Start (DFT Mindset)
a) Avoid Internally-Generated Resets
// BAD - internal reset logic
reg internal_rst;
always @(posedge clk) begin
internal_rst <= some_condition;
end
This makes it impossible to control reset during testing.
b) Make Control Signals Easily Accessible
// GOOD - control signals are inputs (or driven from testbench)
assign enable = ext_enable || test_mode;
c) Plan for Scan Chains (Even if You Don't Implement Now)
d) Include Observability Hooks
// Add internal signals that can be observed during test
wire [31:0] internal_state; // Make this observable in test
assign debug_bus = {
state,
counter,
fifo_full,
fifo_empty,
internal_condition
}; // These get captured in waveforms
Why this matters: When verification finds a bug, they need to observe internal signals. If your design has no observability, debugging takes 10x longer.
#6: Clock Domain Crossing (CDC) Awareness
What freshers do (unknowingly create bugs):
// Clock domain 1 (clk1)
reg signal_from_clk1;
always @(posedge clk1) begin
signal_from_clk1 <= some_condition;
end
// Clock domain 2 (clk2)
always @(posedge clk2) begin
if (signal_from_clk1) // DANGER: Using clk1 signal directly in clk2!
result <= compute();
end
Why this is catastrophic:
What companies require:
// Proper CDC: Double-flip-flop synchronizer
reg signal_sync_1, signal_sync_2;
// Synchronizer in clk2 domain
always @(posedge clk2) begin
signal_sync_1 <= signal_from_clk1;
signal_sync_2 <= signal_sync_1; // Now safe to use
end
// Use in clk2 domain
always @(posedge clk2) begin
if (signal_sync_2) // Safe!
result <= compute();
end
Rule of thumb:
Real example: A fresher once designed an interface between two clocks without CDC logic. It passed all simulations. In the lab, it worked 95% of the time and randomly failed. It took 3 days to debug. The fix was 5 lines of code (a synchronizer).
Common Mistakes Freshers Make (And How to Avoid Them)
| Mistake | What Happens | How to Fix |
| Mixing blocking/non-blocking | Synthesis mismatch, extra logic | Use non-blocking for sequential always |
| Asynchronous reset | Metastability, random failures | Add reset synchronizer |
| Combinational loops | Synthesis failure, timing issues | Run lint, check all assign statements |
| No linting | 60% of bugs are caught too late | Run verilator/linter on every commit |
| No reset in every register | Latches created, unpredictable behavior | Explicitly reset or assign every register |
| Clock domain crossing without sync | Metastability, random failures | Add a double-flop synchronizer |
| Incomplete if-else statements | Latches, unintended behavior | Always specify what happens in the else branch |
How to Practice These (Before Your Internship)
Exercise 1: Rewrite Old Code
Take a simple design you wrote in college (counter, FIFO, state machine). Now rewrite it following these 6 practices. Notice how it changes.
Exercise 2: Lint Exercise
# Install free Verilog linter
apt-get install verilator
# Lint your code
verilator --lint-only your_design.v
Fix every warning. Understand each one.
Exercise 3: Clock Domain Crossing
Design a simple async FIFO (2 clocks, one write clock, one read clock). Implement proper CDC synchronizers. This is a classic interview question.
Exercise 4: Create a Design Template
Build a template module that includes:
Use this template for all future designs.
Interview Questions You'll Get (Based on These Practices)
"What's wrong with asynchronous resets? How do you fix it?"
Expected answer: Metastability risk → use synchronizer with 2 FF cascade
"Explain blocking vs non-blocking assignments."
Expected answer: Blocking = simulation order, Non-blocking = parallel execution (hardware reality)
"You have logic in two different clock domains. How do you safely pass signals between them?"
Expected answer: Double-flop synchronizer (or multi-flop if really fast clocks)
"What's a combinational loop and why is it bad?"
Expected answer: Creates oscillation, timing analysis fails, impossible to synthesize
"Your RTL passes simulation but fails timing closure. What could be wrong?"
Expected answer: Blocking assignments, combinational logic in sequential blocks, missing resets causing latches
What Companies Actually Look For
When senior engineers review RTL from freshers, they're checking the following:
These 6 practices address all 5 of these criteria.
Next Steps: Master RTL Design at Scale
If you've read this far and thought "I want to be really good at RTL design," here's the truth:
Reading about best practices ≠ Mastering RTL Design
You need:
This is exactly what the Futurewiz RTL Design Mastery Course covers:
Many Futurewiz students go from "confused fresher" to "senior RTL designer" in 6 months.
Final Checklist: Are You Ready?
Before you start your internship/job, make sure:
If you checked all 7 boxes → You're ahead of 90% of freshers.
If you checked 5-6 → You're on the right track. Spend 2 more weeks on practice.
If you checked <5 → Spend focused time on the sections you're weak in. Use the exercises above.
What's Next?
 Verilog vs SystemVerilog - A Complete Guide for VLSI Learners
 How to Build a Killer VLSI Portfolio in College (5 Projects Every Student Should Do)
 RTL Design Best Practices That 90% of Freshers Ignore (But Companies Love)
 Digital VLSI vs Analog VLSI vs Mixed-Signal – Which One Should You Choose in 2026?
 Designing VLSI Circuits for Quantum Machine Learning Algorithms
 Online vs. Traditional VLSI Physical Design Courses: Pros and Cons
 Advances in VLSI Design for Artificial Intelligence Applications
 Choosing the Right VLSI Training Institute: Factors to Consider
 VLSI Design for Energy-Efficient Wireless Sensor Networks
 How to Become a VLSI Chip Designer: A Beginner's Roadmap for 2026
 A to Z on India, Japan & the Future of Semiconductor Industry: A New Chapter in Tech Collaboration
 RTL Design vs Physical Design: What's the Real Difference?
 The Future of the Semiconductor Industry: What Indian Students Should Know
 Top 7 Career Paths After Completing a VLSI Course
 Best Time Management Tips for Students Preparing for VLSI Careers
 Mastering VLSI Physical Design: A Comprehensive Course Overview
 The Complete FPGA and ASIC Guide
 Verilog Essentials: Mastering the Fundamentals of Hardware Description Language
 Unleashing the Power of System Verilog: A Comprehensive Guide for Aspiring Designers
 Demystifying VLSI chip Design: Exploring the Core Concepts of VLSI Courses
 Basics of VLSI - An Ultimate Guide
 Career Prospects After Completing A VLSI Course
 Top 5 Reasons To Take Up A Professional VLSI Course
 Mastering VLSI Design: A Comprehensive Guide To Understanding Complex Integrated Circuits
 Future-Proof Your Career With A VLSI Course: How Learning About Integrated Circuits Can Boost Your Job Prospects?
 System Verilog: An Overview
 Introduction to Hardware Description Language (HDL)
 Unlock The Potential Of VLSI Design With An Integrated VLSI Course Online
 Universal Verification Methodology:An Efficient Verification Approach
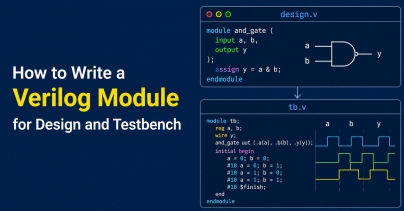 How to Write a Verilog Module for Design and Testbench
 What Are the Different Career Paths in the VLSI Industry?